VScreen Level editor allows you to:
- Create map for the game.
- Define the start position of the Player Character in the level.
- Position NPC (Non Player Characters) in the level and define their properties.
- Select patterns, palette, sprites and map files used for a level.
- Define the level name, number of bonus to collect, level height and width and other settings.
- Position exits and link levels between them.
Installation / Starting the application
Unzip the archive file in a directory. The archive contains the application itself and different sample files that can be used for editing a level. The application will prompt you to select a Level Description File. Note that all the files used for a level should be located in the same folder as the application itself.
Main screen


The “Files” menu contains the option for creating, loading or saving a level or leaving the application.
The “Tools” menu contains the option to:
- Reset the default values in the “Level” tab.
- Toggle the display of sprites in the level on/off.
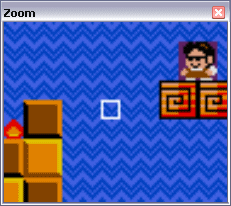
- Toggle the display of the zoom window on/off.
- Toggle the display of the Special Tiles window on and off.
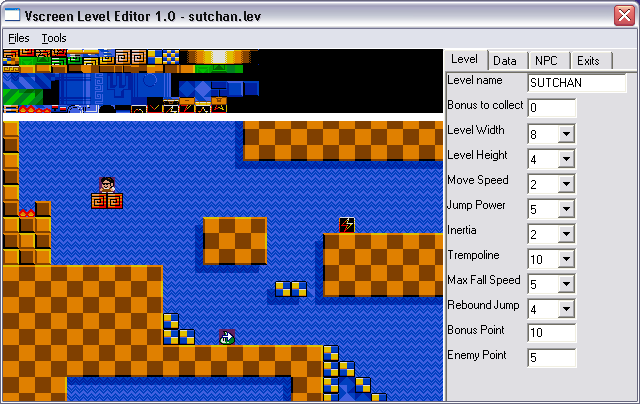
The Level tab allows you to define parameters such as:
- Level Name: Will be displayed when starting the level.
- Bonus to collect: Number of “Bonus” to collect to open the exit door.
- The level width (1-8 screens). Note that this only affects the scrolling on the MSX, the level file still contains 8×4 screens.
- The level height (1-4 screens). Note that this only affects the scrolling on the MSX, the level file still contains 8×4 screens.
- Move speed: Maximum speed for the movement of the main character.
- Jump power: How high will the main character jump.
- Inertia: Response level of commands.
- Trampoline: Jump power when one trampoline (should be higher than regular jump power).
- Max Fall Speed: Gravity level.
- Rebound Jump: Jump power when bouncing on a NPC (non player character).
- Bonus point: How many points when collecting a bonus.
- Enemy point: How many points when killing an enemy.
- Parallax on/off: Background parallax scrolling.
- Animations on/off: Animated tiles.
The Data tab allows you to select which file you want to use in you level. The required files are:
- The level description file (.lev)
- The level map file (.stg)
- The level pattern graphics file (.sc4).
- The Sprites graphics file (.tgs). Note that when you load a .tgs file, it also loads the associated sprite color file (.tcs), thus both files must have the same name.
- The enemies positions and attributes file (.mst).
- The Moonblaster music file (.mbm).
- The Moonblaster sample kit file (.mbk).
- The Score GFX file (.scr).
The NPC tab allows you to add/remove NPCs (Non Player Character) and define their settings :
- Add NPC: Add a NPC, after clicking this button, position the NPC on the level map.
Delete NPC: Remove the selected NPC from the level map. To select a NPC the map, click on it’s top left corner. - NPC type: Define it’s movement type:
0- Pingpong: Go back and forth for the distance specified in the “NPC repeat”. Will also mark a pause for the duration specified in the “NPC” pause field before swapping direction.
1- Reserved: Type reserved for future use.
2- Fall on edge: NPC will swap direction when reaching an obstacle and fall when reaching an edge.
3- Stop on edge: NPC will swap direction when reaching an obstacle or an edge.
- NPC direction: Initial direction of the NPC. Direction “Up” or “Down” will NOT work with NPC of type 2 or 3.
- NPC collision: Define how collisions are treated between NPC and player Character:
0 – Normal: Player Character can kill NPC by jumping on it only.
1 – No collision: No collision detection.
- NPC bounce: Define the bouncing level of the NPC character (can only be applied to NPC type 2).
- NPC repeat: Distance performed by NPC before swapping direction (can only be applied to NPC type 0).
- NPC pause: Duration of the pause before swatting direction (can only be applied to NPC type 0).
The Exits tab allows you to link another level to an exit. To do so select a door (opened or closed) present on the map (click on it’s top left corner) and go to the “Exits” tab”.
- Exit level: Click on this button and select linked level.
- Exit type: File type linked (another level/BGM/executable file).
Note that you can have a maximum of 10 active exits per level.
Controls
- S = Position Player Character start position at cursor location.
- Cursor = Scroll Map in all directions
- Left Mouse Button = Select blocks, options, position blocks. Hold LMB down to paint area.
- Right Mouse Button = Unselect current block/NPC.
